Documenting my family’s lives is a big deal to me. I’m an avid journaler and scrapbooker, all because I think preserving the past is wonderful and important. But documenting and organizing your past can be a big job. After all, with every passing year the job only gets bigger and bigger.
So let’s talk about organizing your printed pictures. Digital photos are a whole different ballgame and I will discuss organizing those at a later date, but today I want to focus solely on printed pictures.
That’s right. Back in the day before digital cameras existed all our pictures were taken on film, developed in a lab, and printed on photo paper. And then we got to take home that nice paper envelope of pictures.
But then what? What did you do with those paper envelopes? And what should you do with them now?
My mom personally kept all our printed pictures in a dresser drawer. It wasn’t messy at all–every paper envelope was stacked very neatly in there–but it wasn’t organized in any particular way. If you wanted to find a specific picture, you had to open and peruse every single envelope before you found the one you wanted.
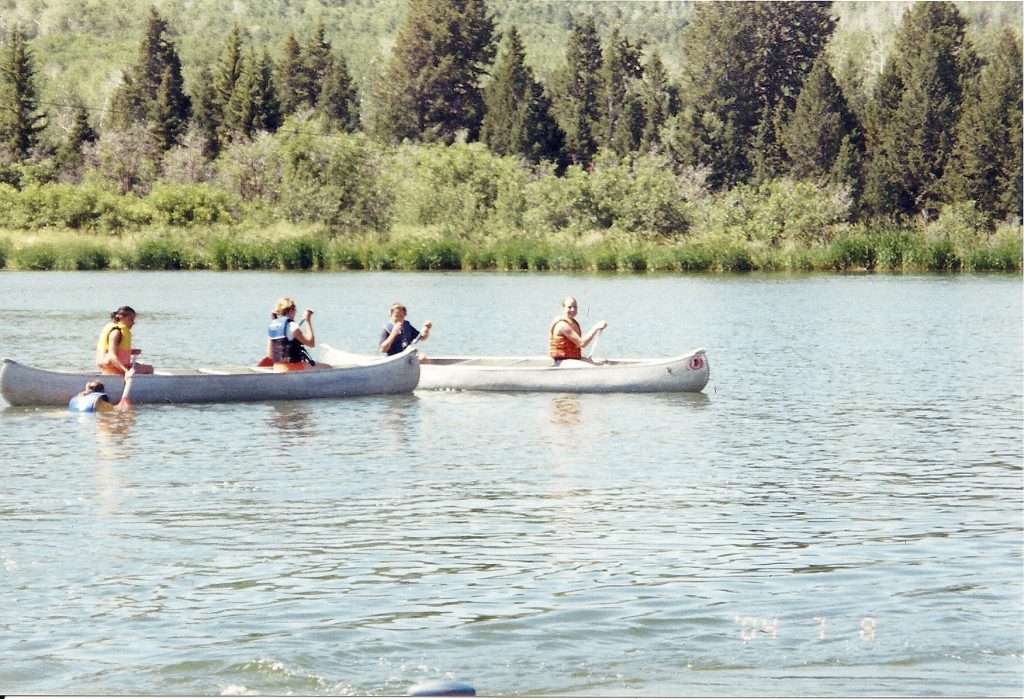
I was a teenager when I first started scrapbooking, and the first pictures I scrapbooked were the ones I took on my very own disposable camera (which was SO COOL back in the day!) of me attending LDS Girls Camp. After that I wanted more, so I went in search of my baby and childhood pictures. And that eventually led to my mom’s drawer of envelopes filled with printed pictures.
And thus began the massive organizational overhaul of my family’s pictures, dating all the way back to my parents’ wedding in 1987. It was a huge project that took me several years, and even longer after I decided to scan and digitally preserve all these pictures as well. But in the end I now have all of my family’s pictures sorted chronologically dating from 1987 to the present.
So if you want to likewise get your printed pictures organized, accessible, and kept safe, then you’ve come to the right place. I’m here to help! And trust me, I fully understand how overwhelming it can be to stare blankly at 20 years of pictures and not even know where to start. But starting is the most important step, because you’ll never even come close to finishing if you don’t start.
But the task doesn’t have to be as daunting as you might think it is. I’m here to share 7 simple steps that I’ve learned along the way for organizing your printed pictures. So let’s get organizing!
1. Decide How You Want Your Pictures Sorted
Similar pictures need to go together, obviously. But there are a few options here. You could sort your pictures by:
- DATE (sorted by year: 1994 pictures in one folder, then 1995 pictures, etc.)
- PERSON (each sibling in the family could have a section for his/her own school pictures, baby pictures, birthdays, etc.)
- EVENT (weddings, vacations, holidays, etc.)
Personally I’m a chronological kind of gal, so my pictures are sorted by year. However, each year folder has subcategories for different people or events. So my 2001 folder includes subfolders for every birthday from that year, every school event for all of my siblings, every holiday, and every around-the-house spontaneous snapshot taken in the year 2001.
The only downside to this chronological system is this: When you’re looking for a specific picture, you need to already know what year it was taken. If you were looking for our pictures of our family vacation to California for my aunt’s wedding and trip to the beach, you’d have to know beforehand that that vacation happened in 1997.
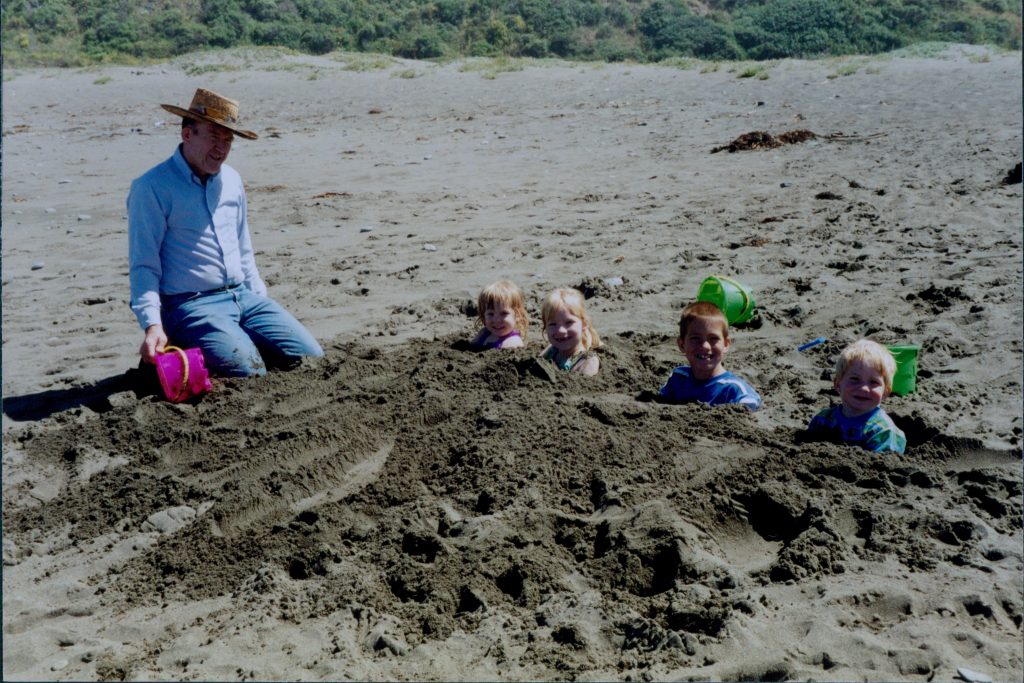
That’s how my brain works and that’s how I wanted it for myself. You, however, might want something different.
When I was a newlywed, I also helped my new mother-in-law organize a bunch of her pictures. She had all sorts of pictures scattered throughout her house in various envelopes and boxes and she wanted to consolidate and organize everything, and since I absolutely love organizing stuff, I was way on board to help her out.
She, however, didn’t care about the date a picture was taken, but who was in the picture. She sorted her pictures by person. She bought a photo box for each of her seven children, labeled the boxes with each child’s name, and then put that individual’s pictures in his/her respective box. That meant that everyone’s baby pictures, school pictures, and wedding pictures were all together, but it was still sorted. In the end my husband and each of his siblings got to take their own box of photos home with them.
There is also a downside to this system: If my husband is looking for a specific picture, say the one of him in his little tux at his sister’s wedding, then even though he knows her wedding was in 1996, he still needs to sift through his entire box of pictures in order to find that individual one.
There are pros and cons to both methods. You need to decide which is best for your personality and needs. Think of your goal for your pictures and make a decision.
2. Create a Safe Storage System
You want your pictures to be safe, first and foremost. What’s the point of organizing them if they’ll just get ruined immediately after the fact?
First and foremost, printed pictures need to be kept somewhere that is acid free. And those paper envelopes from Walgreens are usually NOT acid free, so get them out of there!
Most regular printer paper, folders, and envelopes are not acid free and they will erode your pictures over time. So only use paper and products that are specifically labeled acid free.
Note that scrapbook papers and cardstock are typically acid free, as they are specifically designed for pictures, but always doublecheck just to be sure.
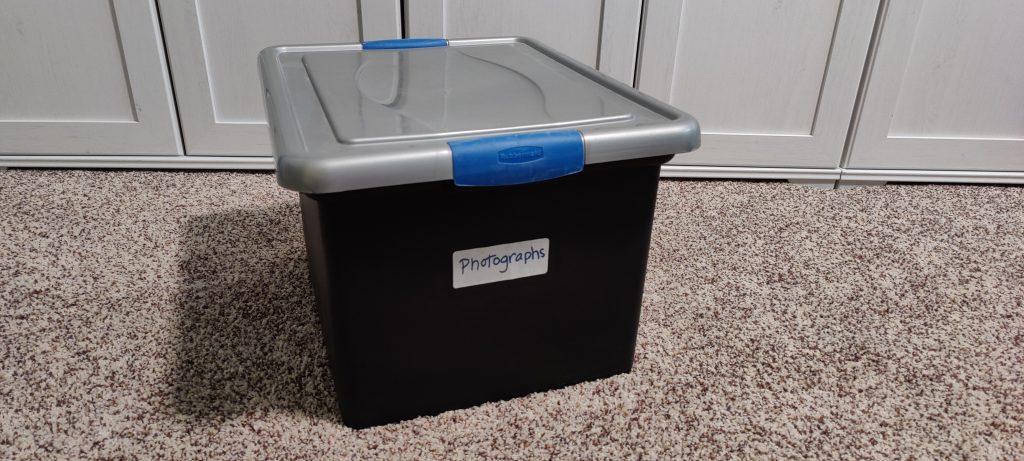
Besides paper envelopes or folders, you’ll also need a box to keep everything in. But do NOT use this style of Rubbermaid bins and tubs for pictures. Why? Because of the rounded corners. If your straight-cornered pictures get pressed up against that curved edge, it will bend your picture. Get a strong, sturdy box that has sharp, right-angle corners.
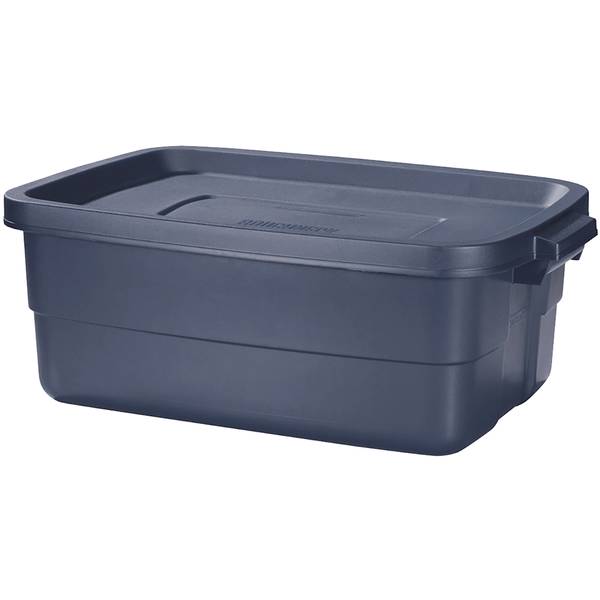
Also consider the sizes of your pictures, as different sizes require different storage. For pictures that are 4×6 or smaller, I use these photo boxes. They are sturdy, easy to use, and really darn cute. You can get photo boxes like these at just about any craft store. Also note the crisp, sharp corners that those above-mentioned Rubbermaid bins lack.


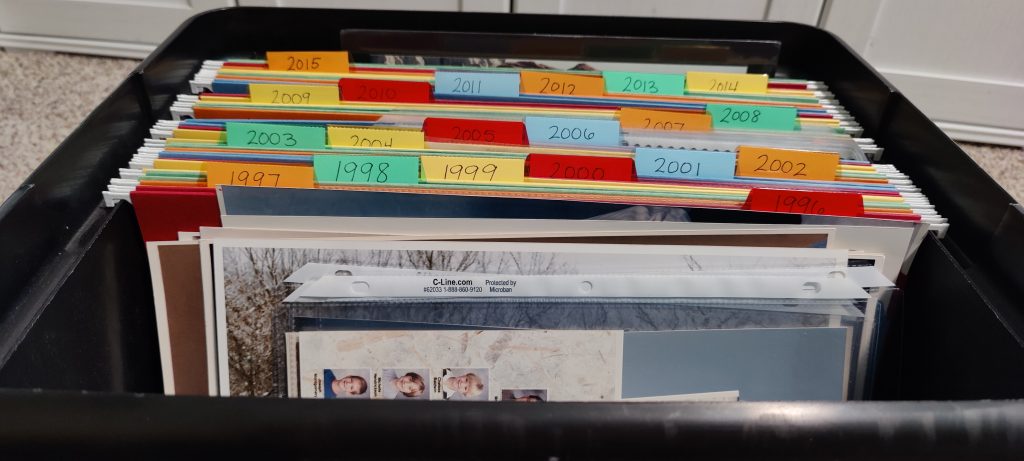
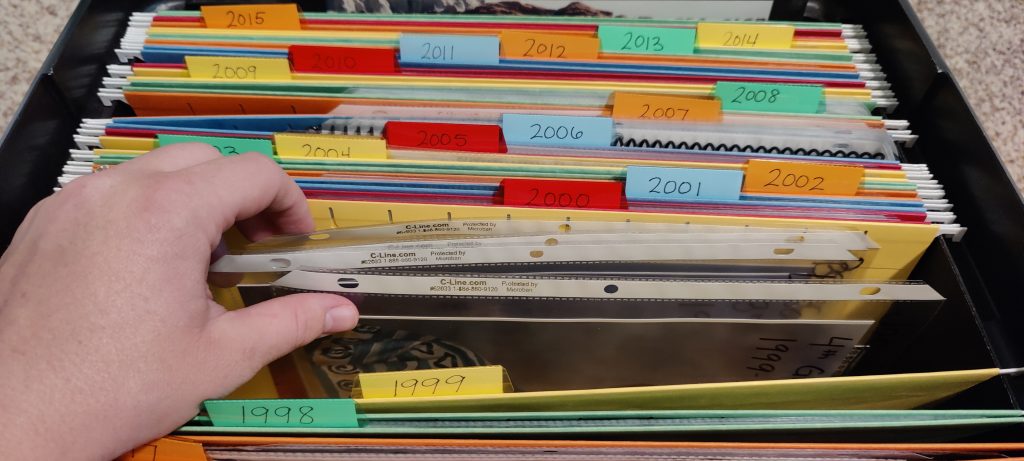
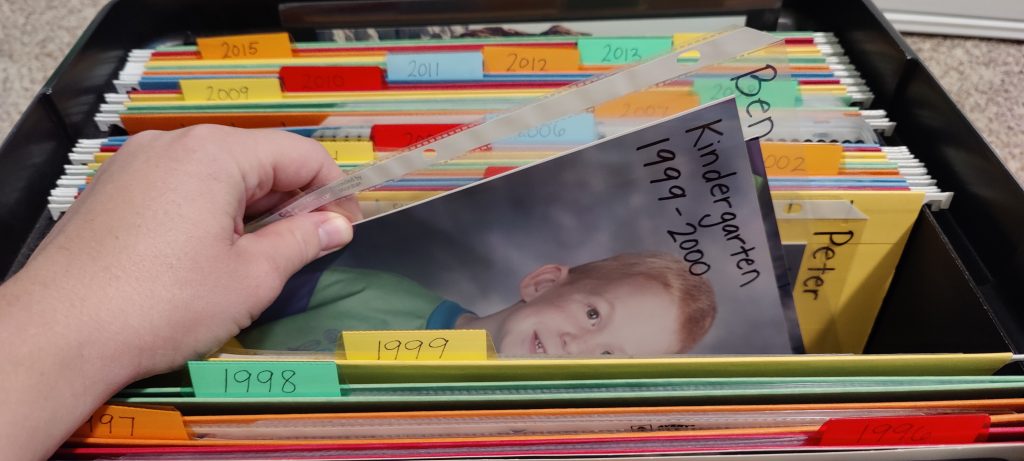
For my larger pictures, the 5x7s and 8x10s, I use a large hanging file-folder box. I have each hanging file labeled per year, but within each file is an acid-free page protector that holds the actual photos. It’s clean, easy to use, and super safe for my pictures.
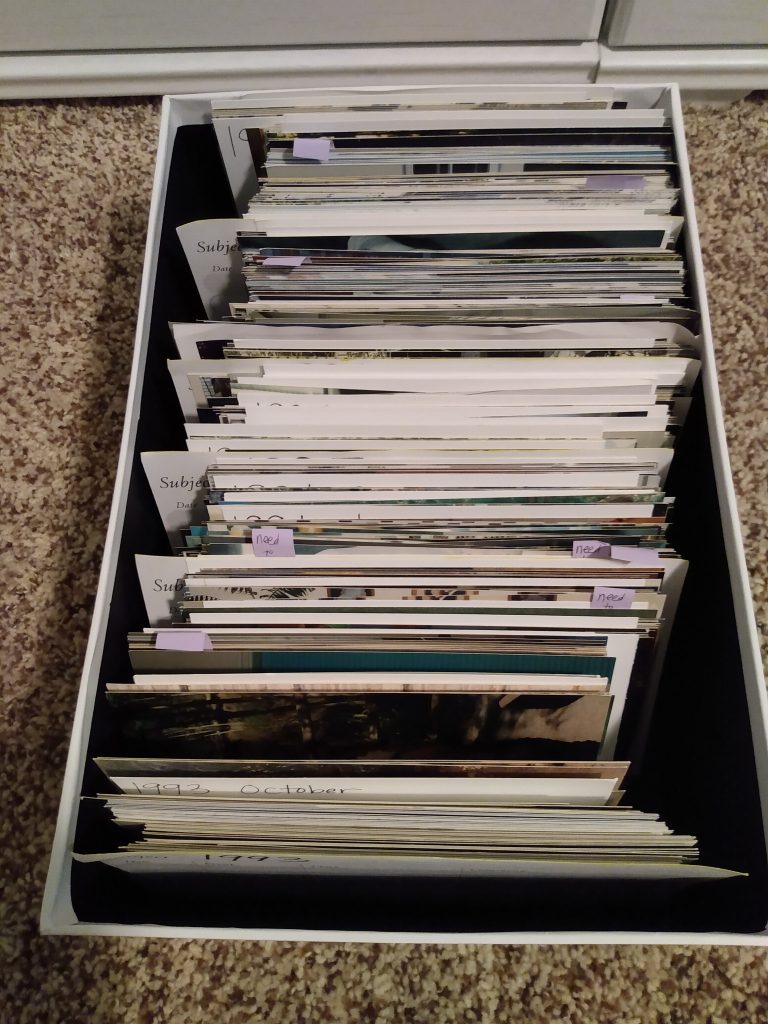
I highly recommend storing your pictures upright. If they are just a flat, big stack, then they aren’t very accessible and just look messy. Plus they are more likely to get turned, pushed up against the side of your box in a weird way, and bent. Store your pictures upright so you can flip through them like a card catalog. They’ll be easier to see and they’ll look nicer too.
3. Enlist a Buddy Who Is Involved in the Pictures You’re Organizing
Extensive family history project? Involve Great Aunt Sue or Grandma, or someone as closely related to the subject material as possible. Organizing your childhood photos? Involve your parents and/or siblings. Organizing your now-adult kids’ pictures? Involve those kids!
Having a buddy (or several buddies) is essential for three big reasons:
First, it makes sorting pictures fun. You’re guaranteed lots of happy reminiscing and “aww!” sounds all around. Likely you’ll hear all sorts of family stories you’ve never even known before. It creates a great bonding experience between you and your picture-sorting buddy.
When I was very early married I helped my new mother-in-law scan and organize a whole bunch of her old pictures. I saw all the adorable pictures of my new husband as a little boy and all his siblings, my new in-laws. I heard countless stories about them and got to know my new family so much better than before. I felt a new and stronger connection with them simply by knowing and understanding their history better. And I really bonded with my new mother-in-law and we both really looked forward to our weekly picture-scanning nights.
Second, a good buddy will be good motivation. As I would suggest with any daunting project, make yourself accountable to another person and you’ll feel more motivated to get your project done. It’s easy to ignore those shoeboxes full of pictures when you’re the only one who knows they exist, but setting up a weekly date with your buddy to sort them will keep the project alive and progressing. Your buddy is there to encourage you in case you want to quit.
Third, a buddy is an excellent backup to help you remember things. Sometimes sorting pictures takes some detective work. It’s such a relief to be able to ask someone else, “What year did Aunt Tamara get married? Oh yes, that’s right.” or “Who is the baby in this picture, Peter or Daniel?” or “Who in the world is this guy with the mullet?”
This is also why it’s better for your buddy to be involved somehow with the pictures you’re sorting, someone who can tell the babies apart and who was present at all those important events.
For example:
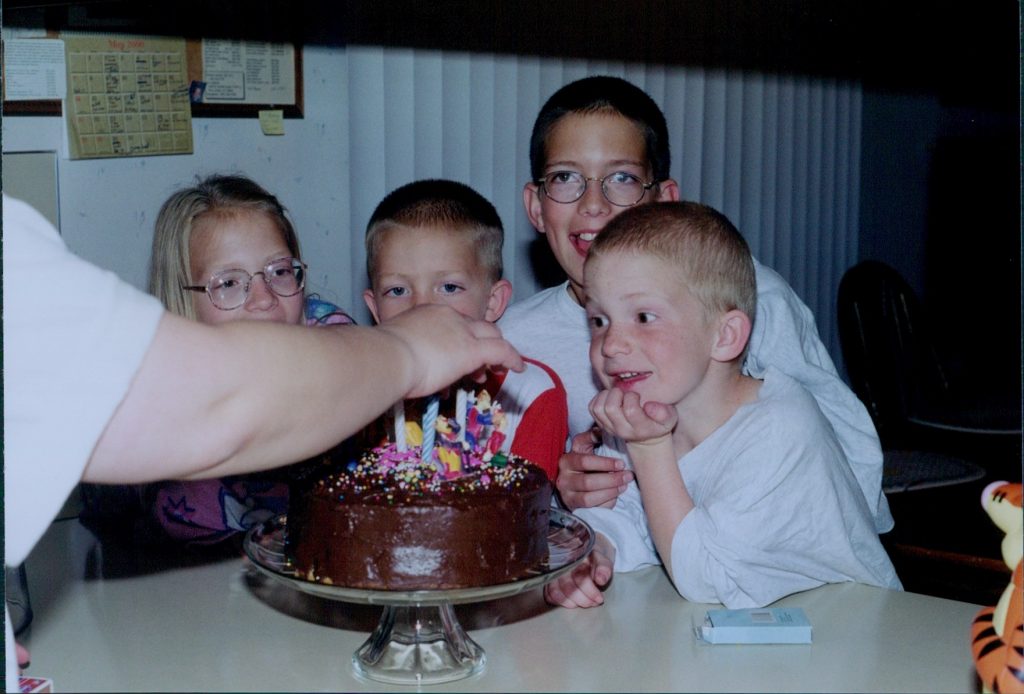
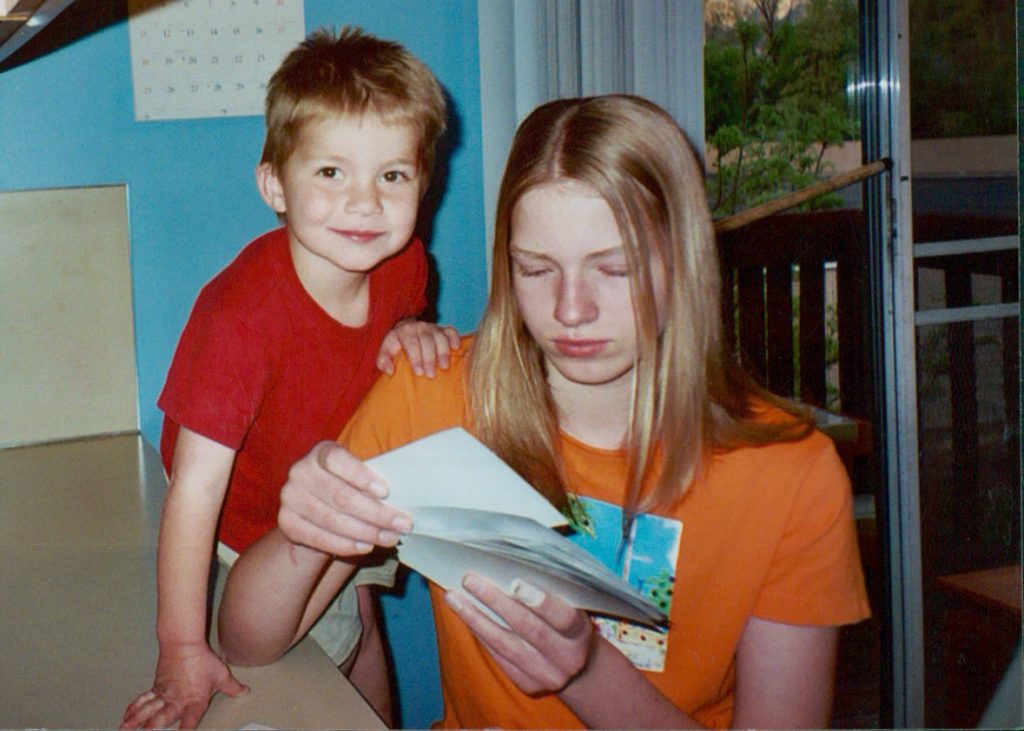
I was baffled by this picture for a very long time. Here is me and three of my four brothers, placing it before the youngest was born, but that was about my only clue. We are sitting around a birthday cake, but my mom’s arm is blocking it so I can’t tell whose birthday it was or how old they were turning, seeing as I can’t see to count the candles.
I gave up, my detective skills exhausted, and handed it to my mom, who was a great picture-sorting buddy. She noticed what I had missed: “There’s a calendar in the background!” It was tiny enough that we used a magnifying glass to double check, but sure enough we were able to read “May 2000,” meaning the picture was my second youngest brother’s 4th birthday.
Brownie points to Mom! I never would have found that out without my picture sorting buddy.
4. Create and Label a Folder (or Box, Envelope, etc.) for Each Category
Since I sort my pictures chronologically, I have a labeled section for each year. If you’re sorting by person, make a labeled section for each person.
I already said that I use photo boxes to store my 4×6 pictures. For each year within that box, I have a year card with the specified year.
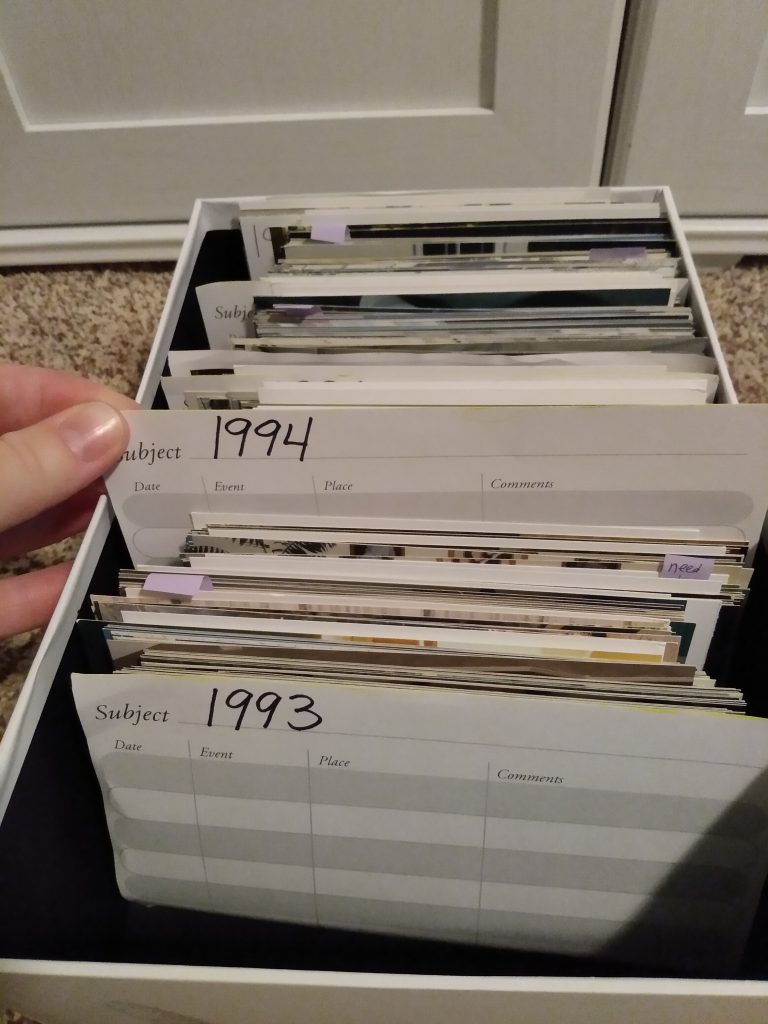
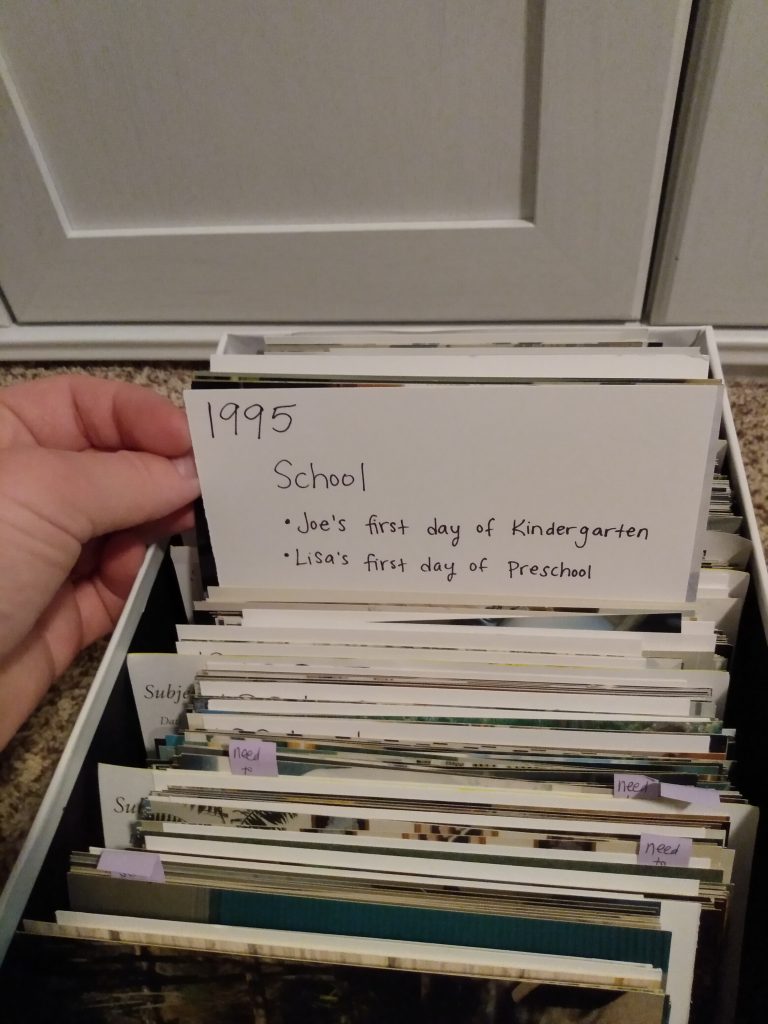
Within that year, I have subfolders that I made out of white, acid-free cardstock to hold individual pictures. Then I can label these subfolders as specifically as I want. For example, some folders list details of a family vacation including the date and location of that specific trip. Other folders simply have a person’s name on it and will contain all the pictures of that person within the specified year.
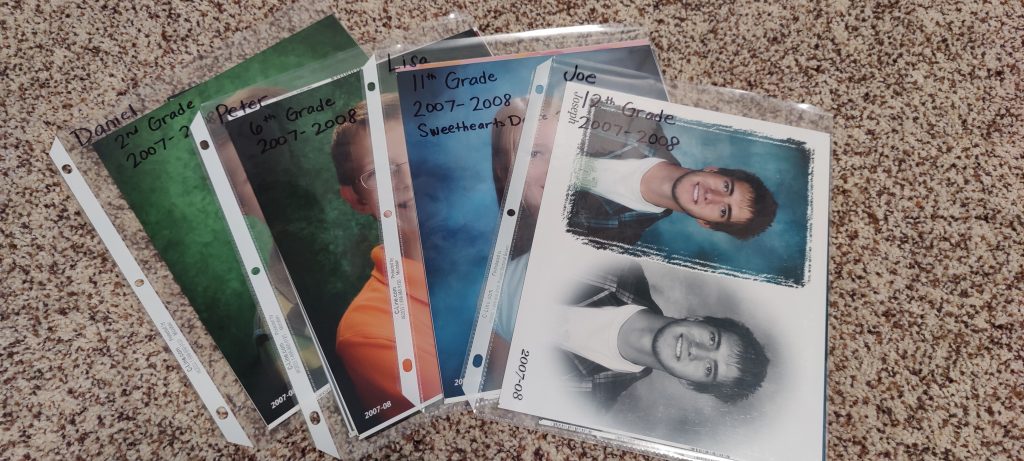
I do a similar sorting system for my larger photos, which includes 5×7 and 8×10. These are typically professional prints and school pictures. I have a hanging file folder labeled for each year. Within that year, I use a clear sheet protector to hold the actual photos.
The sheet protectors are super easy to label; you can write with a sharpie directly on the sheet protector, or use a sticker label or even a Post-It. This keeps the photos separate, safe, and easy to find.
You can experiment with folders, boxes, hanging files, or envelopes to fit your specific needs. Just remember to keep those photos safe!
A Note About Labels:
Always label, label, label your folders! Be as detailed as you can. Include dates, locations, and people involved, as much as you know. Label, label, label! This is what will make your photos easily accessible for both you and other family members.
But keep your labels simple!
There was once a time in my life when the perfectionist in me thought that every single label needed to be neatly typed and printed from my computer. But labeling anything suddenly became such an overwhelming task because I had to measure things, size the fonts correctly, cut it out with the straight-edge cutter (because I’m a perfectionist, remember?), and mount it straight. Just making these professional-esque labels was so daunting!
So I forced myself to stop and accept a sharpie with neat handwriting as a beautiful and acceptable alternative. Notice in the above photos that both my mini 4×6 folders and my 8.5×11 page protectors are labeled neatly so they are super easy to read, but they are also simple and took me just a few seconds to write.
Don’t kill yourself trying to make something all cutesy and Pinteresty. It’s not worth it. Like in so many other areas of your life, remember to K.I.S.S:
Keep It Simple, Stupid!
5. Sort the Pictures Based on Your Chosen Categories
This is the fun part, and also the most time consuming. Sort your actual photos!
6. Don’t Keep Pictures You Don’t Like
As you sort, don’t feel obligated to keep pictures you don’t like. If the picture is too out of focus to see anything, toss it. If a toddler got a hold of the camera and you now have several shots of the ceiling, toss those too. Even if you just feel self-conscious about that certain picture because you were talking instead of smiling and so you look like a frog, toss that sucker!
We all have a frog picture or two, believe me.
If you have pictures that have a great subject but are only slightly bad (blurry, dark, red eye, etc.), don’t despair. There are lots of digital picture restoration services available. Photoshop is the most well-known photo editing software out there, but there are plenty of other cheap or free programs that will still get the job done. You can also hire a professional to do the touch-up work for you. With very little effort you can fix red-eye, repair tears and wrinkles in the printed picture paper, sharpen slightly-blurry pictures, or even remove acne spots. So digitize your less-than-perfect pictures, fix them, and reprint them. Easy!
Also don’t feel obligated to keep pictures of other people. Keep your own memories, but you don’t have to keep that fifteen-year-old Christmas card from your random neighbor. Toss those for sure.
Remember back when pictures were sent a lot more often in the mail, like before the days of email and Facebook? My mom has lots of pictures from the 1980’s and 90’s of nieces and nephews, aunts and uncles, and distant cousins sent usually with a family letter. They were perfectly lovely 30 years ago, but today they just aren’t sentimental enough to be worth keeping. Instead of tossing these (they’re perfectly cute and in great shape) I put them aside and returned them to the original senders. My aunt, surely, would appreciate this picture of her own baby much more than we would.
My final suggestion about not keeping bad photos is this: you are not obligated to keep photos of people whom you’ve since cut from your life. If old photos of perhaps an ex-spouse or a toxic ex-friend bring you more pain than joy, then you are not obligated to keep them.
A few years ago, after I’d digitized my family’s collection of printed pictures, I decided to share my newly-digitized pictures with my extended family. I had 25+ years of family reunions, graduations, weddings, and holidays featuring my aunts, uncles, and cousins as well as my immediate siblings. So I started collecting all the pictures into a digital folder to share…but then I stopped.
My aunt had then-recently divorced her husband of almost 30 years, and so this particular ex-uncle naturally happened to be pictured in lots of events through the prior decades. I wasn’t sure if my aunt or her children wanted me to share those particular pictures or not. So at the next family gathering I asked her privately (and tactfully, I hope) what she would prefer I do with those. She requested, very kindly, that I not share pictures of him. And I respected her wishes entirely. I couldn’t remove him from large group photos, obviously, but I didn’t keep any pictures of exclusively him.
In fact, my aunt told me what she herself had done with all of her old pictures of him, which were now too painful for her to keep: She said that she put them aside in a special box for her children; he is, after all, still their father and they could decide for themselves what photos of him they wanted to keep or not. I thought her solution was wonderfully wise–it both put those painful memories out of sight and out of mind for her, while also granting that respect and freedom to her children. It was a great idea for handling potentially-painful photos.
So the bottom line is this: yes, we all have painful memories and perhaps we have painful people associated with bad memories. You can’t erase those memories from existence, but you don’t have to continually bask in them either. So be wise in what you keep and be mindful in what you pass on for future generations.
7. Guard Your Newly-Organized Pictures with a Crazed Zeal
Sort, sort, sort, and look at you go! Congratulations! Your pictures are now neatly organized and ready for display or safe storage, or even better: digital backup.
Side Note: Always scan and make digital copies of your printed pictures. Heaven forbid they should be ruined in a flood or fire, or even just stepped on and wrinkled. Digital copies will also keep your newly-sorted boxes away from others who might mess up your hard work.
My younger brother jokes about wanting to elope (eventually in the future when he gets married) instead of having a traditional wedding. I’m a fan of traditional weddings and receptions, so I know he likes to poke at this topic just to annoy me. With that in mind, I still remember this funny memory with him that happened when I was sorting pictures one day.
He was chatting with me as I worked and the thought came to me, “I have another reason you should have a traditional wedding reception!”
“What’s that?” he asked.
“You can have a slideshow of all your baby pictures,” I said excitedly, “Because they are all beautifully organized right here!” I gestured to my neat, meticulously-organized photo boxes.
He laughed and rolled his eyes.
But then the true, horrible implications of my offer struck me. A horrific vision danced across my mind and I suddenly pictured him and a future-fiancé rifling through my meticulously-labeled boxes and folders, looking for photos to use for a silly slideshow, whipping out pictures at random, and sticking them back willy-nilly.
They would ruin my whole organization system!
I looked back at him, the roll still in his eyes, and said in all seriousness, “I changed my mind. If you want baby pictures for your wedding, they’re all on the computer; reprint whatever you want. But don’t you ever touch these boxes!”
I’ve been accused before of obsessive behavior, and especially in cases like this I think I border on dangerously possessive. But I have every right to be! I’ve put in countless hours scanning and organizing those pictures, so I don’t feel badly one bit ruling over them with an iron fist.
Be just as protective of your pictures and don’t ever apologize for it! Don’t let others mess them up with their grubby hands! Guard them like a dragon over its hoard!

Oh yeah, and love and enjoy how wonderfully organized and safe your pictures are. That too.
Happy organizing!
