I am a champion project starter. I tend to get these grandiose ideas in my head and then jump right in excited and rearing to go!
Until I hit a road block. I get bored. I underestimated the skills required to do such a project. A different, newer, and more exciting project catches my attention.
Or most often I get overwhelmed by my own “crippling perfectionism” as I call it; I struggle doing something not “perfectly” and therefore I simply quit if things don’t go as “perfectly” as I want.
It’s a real issue that I struggle with, believe me.
But dealing with crippling perfectionism is a totally different issue that I could write a whole essay for on its own. But not today!
Today I’m going to share some tips that I recently learned that have helped me tremendously to get my projects DONE!
It all started with this free webinar from this little website I found on Facebook at LearnDoBecome.com. Another friend liked the page, which is how I saw it, and it promised a free webinar on decluttering and organizing your life.
Decluttering and organizing tips? For free? That’s exactly my cup of tea! And I signed right up.
But I will be honest, I got a bit more than I bargained for. Instead of a few decluttering tips, it introduced an entirely new mindset that has totally changed my productivity these past few months. And that’s what I’m here to share with you.
The LearnDoBecome team (which is a husband and wife duo) offers quite a bit of organizing support in all sorts of different areas. This particular free webinar focused on one specific aspect of organization: Finishing Your Projects.
For the record, I’m going to define a “project” the same way the LearnDoBecome webinar defined it: A “project” has a start and an end. So reoccurring chores such as mowing the lawn and folding laundry are not projects. Projects are things that have a distinct end, things like hanging pictures on the wall, laminating labels for toy bins, fixing the scratches on the furniture, that sort of thing.
I had no idea that this free webinar would speak to me so deeply right off the bat. So I’m going to do a very quick sum-up of what they said and then I’ll detail how I used their suggestions in my life. Finally I’ll share my success story and you can see how much I accomplished in just three short months.
Step #1: Make a Master Project List
I’m naturally a list-maker, so I loved this step. I have different lists all over the place on different paper notebooks and digital apps, but I followed the advice here and made one single Master List of all my projects.
Actually that was quite a chore in and of itself. It was a bit like a scavenger hunt as I gathered my various lists from so many different locations, from the magnet-notepad on the side of my fridge to my many grandiose Pinterest boards to the checklists I keep on websites like Trello.com.
I gathered and hunted and searched for all my various lists and compiled them all into one single word document. Then I did a thorough walk-through around my house and listed all the other unfinished projects that I saw lying around. All of those went onto my Master List.
Lastly I did exactly what LearnDoBecome suggested: I did a brain dump. Anything and everything I could think of that’s been bouncing around my brain, all those “wouldn’t it be cool if I did this…” thoughts, and anything else of that nature, all were written down on this Master List.
As I watched this webinar, they said that most people on average have 50-100 unfinished projects hanging over their heads. I totally scoffed at that when I heard it. No way would I have that many! I’m super organized and I stay on top of things pretty well, I was so sure.

Apparently not.
By the time I was done my Master List consisted of almost 70 unfinished projects.
And that DIDN’T include any landscaping work my husband and I are planning for our partially-finished yard.
And that DIDN’T include any work on our unfinished basement.
And that DIDN’T include any Honey-Do items that I needed my hubby’s help with.
And that DIDN’T include any baby-prep projects that I needed to get done before my Baby #4 was due (I was about twenty weeks pregnant at the time).
What the heck? How did I have so many freaking projects that I needed to get done?
So much for being super on top of things.
It was a super overwhelming list. Not to mention that throughout the following month or so I continually added to that Master List every time something popped into my mind that I’d previously forgotten. Or, because life is like that, new projects just crept up from time to time. I added those to the list too as necessary.
Divide Your Master List Into Subcategories
So I made it less overwhelming–as much as I could, at least. First I organized my projects under subcategories (still on my Master List, so it’s all visible on a single document).
I had projects that fit under the following categories:
- Household Repairs (drywall dents, furniture scratches, loose screws, etc.)
- Home Organization & Decor (hanging shelves/artwork, labeling bins, assembling new furniture, decluttering cabinets, etc.)
- For My Boys (organizing new Christmas toys, tossing broken toys, updating wardrobes, etc.)
- Photos (sorting or scanning printed photos, printing pictures for the walls, etc.)
- Quiet Book Pages (I’ve made Toddler Quiet Books/file folder games for my boys to take to church that were only about half done; the other half were either in my craft closet waiting to be laminated or still on Pinterest waiting to be printed.)
- Scrapbooking (these were all paper scrapbooks that I’d started and hadn’t finished, such as my childhood scrapbook and my early-years-of-marriage scrapbook.)
- Digital Scrapbooking (for special trips/occasions I prefer to make digital scrapbooks, but have I actually made any recently? No. So this was a list of vacations, family weddings, Christmases, and first-year baby books for my Babies #2 and #3.)
- Writing (all the unfinished novel manuscripts, nonfiction essays, and blog posts that I’ve started but never finished; these are not vague story ideas in my head, but ones that I’ve actually started.)
- Everything Else
Mark Projects that are Either Digital, One-Day-Doable, or that Cost Money
First, I highlighted all my projects that were strictly done on the computer.
That Digital Scrapbooking category was entirely highlighted, obviously, and so was my Writing category. That way come the evening when I was ready to sit back and relax with my computer, I could easily glance through my Master List and pick a highlighted computer-specific project without getting overwhelmed by having to sift through 60+ things.
Second, I highlighted–in a different color, of course–all the projects that were small enough that they could be done in a single day. I already had any and all the supplies I needed for these and I basically had no excuse not to do it.
Third, I marked with an asterisk any projects that required money, like I had to buy either tools or supplies or anything like that. This way, whenever I did any online shopping I could glance through quickly at the asterisks and buy everything I needed all at once.
Marking the projects that cost money also helped me space those out in a practical way so as not to blow through too much money in one go. Plenty of my organizing/decorating projects included buying new furniture, accessories, bins, shelves, frames, or whatever, and so I tried to space those kinds of projects out as much as I could to help limit my spending in a reasonable way.
But what is the point of this Master Project List, especially when it’s so overwhelming? I hear you ask.
The point is to get it out of your head and onto paper (or a digital word document for me). I don’t have to keep all those projects and goals and ideas rattling around in my head, forgetting some and letting others fall by the wayside. I simply can’t keep track of 60 different projects all on my own. I just can’t.
Now I don’t have to. I don’t have to remember, I don’t have to stress, and I don’t have to sift through my own mental clutter to think about what I need to accomplish next. It’s all right there on my Master Project List.
And so I breathe a lot easier.
Step #2: Choose a Handful of Projects to Focus on Each Month
But as freeing as it was to dump all that mental clutter, it was also overwhelming seeing the sheer reality of all that I needed to get done right there on a single document.
In fact, I started feeling all of those same reasons to quit start to crop up again: This is too overwhelming. Some of these are boring. What if I can’t do them perfectly? I don’t know where to start. There’s just too many!
In fact, LearnDoBecome summed up my mental state perfectly. They described an unorganized and cluttered person as a pinball machine. They spring the ball into the game, ready and willing to get ‘er done, but then they just bounce around all the lights and bells, dinging a few things here, bumping into a few things there, bouncing from project to project, but just dinging it and not actually finishing it.
But being a pinball is exhausting and after all of that bouncing and bumping and dinging, eventually the ball falls. Nothing is actually accomplished. The game is over. And you lose.
Until you fire up the old pinball machine for the next round, this time telling yourself, “This time I’m really going to get stuff done. This time will be different. This time I’ll actually do it!” But to no avail, again.
I don’t often find symbols that so perfectly represent me and my feelings, but this pinball idea struck me like lightning. That’s exactly how I felt, bouncing around and accomplishing nothing; starting new projects over here, making plans over there, and never actually finishing any of it. And so every evening after my boys are in bed I’d think, “Ooh, I have an hour to get stuff done!” But then I get overwhelmed with choices. There’s just so much to get done that I don’t know where to start! So I start dinging around that pinball machine until I give up and just veg out on YouTube until I fall asleep.
Great.
No wonder I can’t seem to finish my projects! Being a pinball is just plain overwhelming!
So that’s where Step #2 comes in: Focus on just a handful of projects each month.
LearnDoBecome suggested choosing 6-8 projects every month. I found that based on the size of the project, sometimes I chose more and sometimes I chose less.
I found this LearnDoBecome webinar near the end of February, so I decided to give it a go for the month of March. I looked over my Master List and picked 8 projects. I tried to pick from various categories: one organization project, one scrapbooking project, etc.
So for the entire month of March that’s exactly what I did. I focused solely on those 8 projects, nothing else. I didn’t worry about the other staggering 60 projects still awaiting my attention. I didn’t bother with anything else. Nope.
I kept my 8 projects on a separate document, one easy to to check every day. And every day I crossed more and more things off that list.
And I accomplished SO MUCH that month!
In fact, I was so successful at with this method that I not only finished my 8 selected projects, but I finished them with so much time to spare that I did more and more and more until I finished 20, yes 20 projects in a single month.
But I don’t want to jump the gun here. I’ll give more details on that later. First let’s move on to Step #3.
Step #3: Divide Your Monthly Projects into Small, Extremely Specific Steps.
LearnDoBecome spoke a lot about how to actually do this. They said that people often make the mistake of only listing smaller projects instead of actual steps.
One of the examples they gave was this: Your project might be to organize your office space. But when you sit down to list the steps of how to go about it you’d incorrectly write things like, “1. Clean out the desk. 2. Clean out the closet. etc.”
Wrong!
Cleaning out the desk is a project in and of itself.
Instead your steps should be SUPER small and SUPER specific. For example, for cleaning out your desk you might list: “1. Gather all the papers into one box. 2. Sort the papers by Keep/Toss. 3. Buy hanging file folders. 4. Organize ‘Keep’ papers into the file folders.” And so on and so on.
So I’ll give you an exact example of one of my projects and how I laid out the steps to accomplish it.
For Christmas my husband gifted me a USA Travel Map, which I was so excited for! It’s a map of the United States where you put a picture of yourself into each state showing how many of the 50 states you’ve visited. I’ve wanted one of these Travel Maps for a while and I was so thrilled to finally get one!
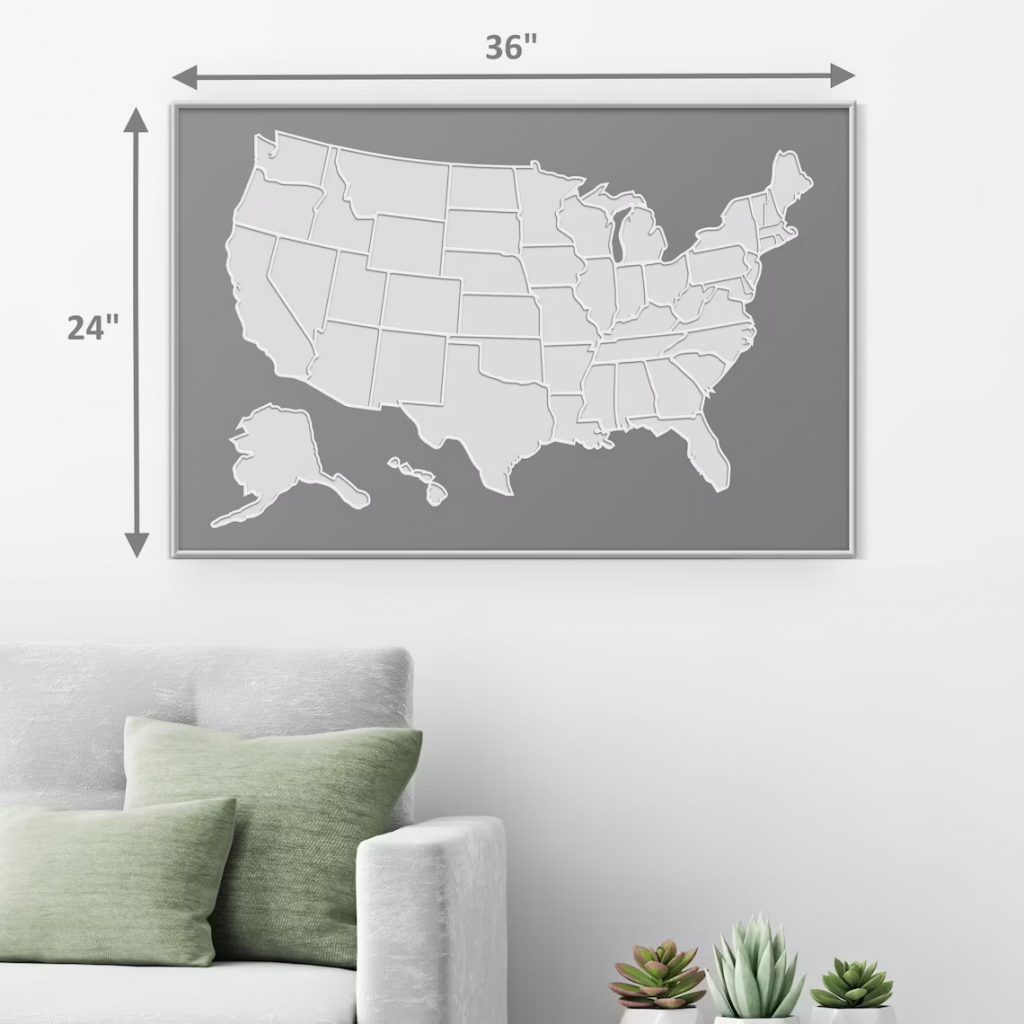
In case you’re curious, this is a link to the specific photo map that my husband bought for me from Etsy: https://www.etsy.com/listing/679516396/travel-gifts-for-couples-travel-gifts?ga_order=most_relevant&ga_search_type=all&ga_view_type=gallery&ga_search_query=usa+travel+map&ref=sc_gallery-1-1&plkey=b284522c61c741e6be8d568d7a9b14a262665292%3A679516396&pro=1&frs=1
And then it sat there and sat there and sat there untouched. I’m not good at finishing projects, remember?
So I listed that I wanted to fill and hang my new Travel Map on my Master Projects List under the Photos category. Then I put it on my monthly Project List for the month of May.
Why didn’t I do it sooner, if I was so excited about it, you might ask? Because I had quite a few other pictures and decorations that needed to go up first before I could choose a space for my map. So I put those earlier picture-hanging projects on my March and then April list, so come May I was ready to finish my Travel Map.
I still followed this tip and wrote down the steps for filling this map in very small and specific steps. My list said this:
Fill and Hang USA Travel Map:
- Choose pictures for each state — that was a fun evening on my computer going through a bunch of old pictures of my various travels
- Cut out the spaces on the map for each state — I used a precision crafting knife for this
- Figure out the needed size for each state picture — I used already-printed pictures I had on hand to see which size fit best in each space and listed it. Utah and Arizona needed 4×6, Nevada and Minnesota needed 5×7, and the biggies Alaska and Texas needed 8×10, etc.
- Order the necessary printed pictures
- Cut the pictures to size
- Tape the pictures into their correct state spaces
- Put the Travel Map into its frame
- Pick a location to hang the Map
- Hang the Travel Map
The list is pretty straightforward, and yes, notice that each step is extremely precise. That’s kind of the point here.
NOTE: I discovered some new and vital information about this project AFTER I’d finished and hung the entire thing. I told you this map was a Christmas gift from my husband. Shortly after I finished the map, my husband just so happened to clean out his office space and found a printed document of instructions that were delivered with the map when he ordered it, only he set the instructions aside, forgot about them, and then wrapped the Travel Map as a Christmas gift without said instructions. I was shocked to find that the instructions offered a website where I could upload the pictures I wanted, size them exactly right, and then get them printed and delivered to me as stickers already in the shape of their specific state. HOLY SMOKES! That would have saved me a ton of time, physically cutting out the state shapes and then aligning and mounting the pictures by hand. I’m just sharing this so you know: READ THE INSTRUCTIONS (if you have them, which I did not!) BEFORE YOU START YOUR PROJECT!
Now this project actually had a big hitch in the middle and I had to add a few new steps than I hadn’t originally planned. When I measured the needed sizes for each state, I found that two specific states were giving me big issues: Hawaii and Massachusetts. Both spaces were so tiny that even a wallet-size print wouldn’t look very good. Basically you’d see like a random spot on my face and that’s it.
My husband suggested the solution that I get some nice photo paper and print those two pictures at home so I could size them as small as I needed. Good idea. But that gave me an entire sub-list for printing these Hawaii and Massachusetts pictures that looked like this:
- Order photo paper
- On computer, size pictures as necessary
- Print pictures
But still, that wasn’t the only hitch. First I accidentally ordered the wrong kind of paper, so then I had to return the wrong paper and order new stuff.
THEN I had the thought to print all my pictures to these more specific sizes and see if it looked better, so I held off on ordering my prints until this new, correct paper arrived.
THEN I had to size all the pictures individually on the computer.
THEN I printed those pictures…and the quality wasn’t as good as I wanted (except for the very small Hawaii and Massachusetts, as I previously said), so I scrapped that idea and went back to my original plan, which was to order professional prints from Costco.
After all that was said and done, my project didn’t get finished in the month of May like I wanted (I also went on vacation in the middle of May, which was just another setback to this project, but that’s okay). My printed pictures didn’t arrive until the first week of June after all those delays. But I’m happy to report that I followed the rest of my list, put them into my Travel Map, and then I finished this project by hanging it on the wall. And look how awesome it looks! I couldn’t be happier.
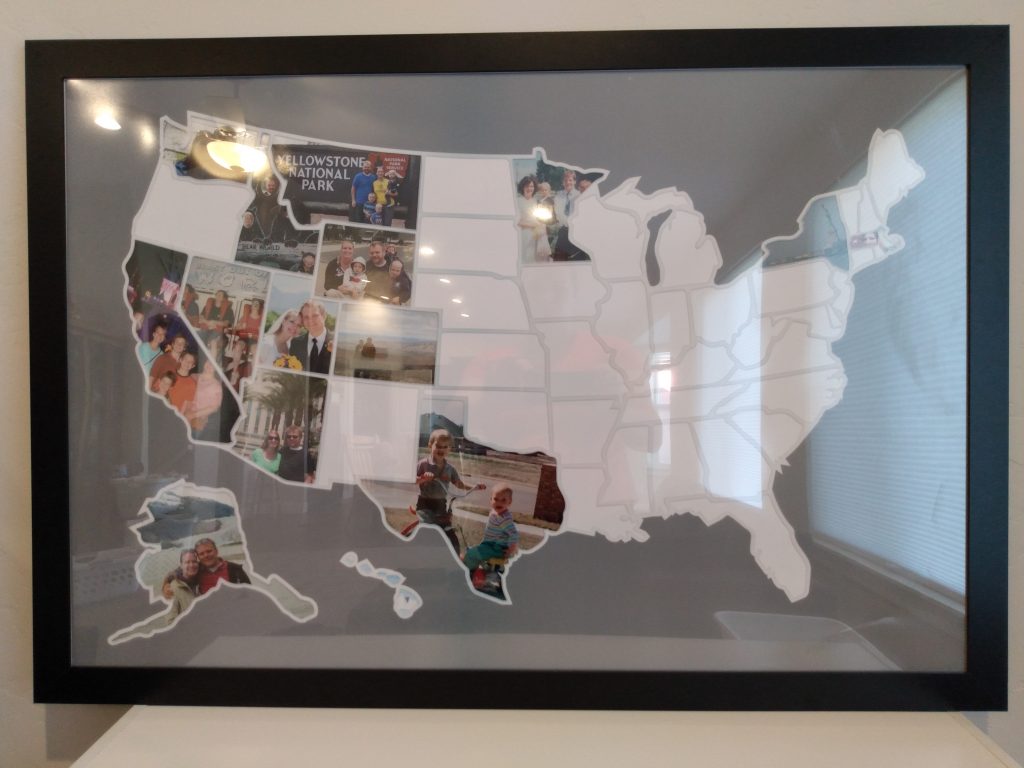
I chose to list this project specifically to showcase not only how detailed and precise the To Do list for each project should be, but to also show that projects may not go exactly as planned. I re-planned this project a couple times throughout the month as certain issues arose. And that’s totally fine; that’s part of life! In fact I’d probably guess that a majority of big projects will look something like this one did, with plans and re-plans and accidentally ordering the wrong things and then more re-plans all over again. That’s okay!
Regardless of how long it took, I’m still thrilled with myself for actually finishing this project. Remember this map has been laying around collecting dust since Christmas, but then I finally accomplished it in June.
Step #4: Follow Those Steps and Work On Your Selected Projects Throughout the Month
I’m going to reiterate this concept again: don’t worry about your entire 60+ Master Project List. Save your document and then close it; out of sight, out of mind. There is no need to drown in the overwhelm of looking at such a huge, daunting list every day.
Instead look at your very short, very easy list of 6-8 projects, all of which are broken down into very small, specific, and not-overwhelming steps.
This is how I typically do it: I like to get this kind of stuff done after my boys are in bed for the night. Then I’m not distracted by my littles getting into stuff while I’m working and their little “helping” hands aren’t getting in my way.
Of course there are always exceptions to this rule; one of my projects was to fix a few drywall dents throughout the house, a few of which were in my boys’ bedrooms. So I obviously had to work on that project during the day when my boys weren’t–you know–asleep in said bedrooms.
So first I open my Monthly Project List and glance down my numbered steps. Do I need to order any supplies? What can be done immediately? Have any supplies/packages arrived that I can go open and get started with? And so on and so forth.
Then I just do it!
Step #5: Bask in the Happy Psychological Boost of Confidence and Awesomeness You Feel From Crossing Things Off Your Lists
Remember before I said that I’m a list-maker by nature. And what’s the best part of making a list? Crossing things off, of course! It gives you a natural mental boost and a sense of accomplishment, even if the task you finished was very small. Just crossing it off still gives your brain that boost and makes you want to cross off more and more things from your list.
So every time I accomplished a step for one of my projects I gave that project the fancy strikethrough feature. Not only did I love watching the steps get ticked off more and more as the month went on, but it also made it very easy to visually see what still needed to be done. So easy!
So How Did I Do with My Projects?
I told you that I discovered this LearnDoBecome webinar and method near the end of February and then I implemented the process for the following three months: March, April, and May.
I was also pregnant at the time with Baby #4 due in July, so I reserved June specifically for Baby Prep projects; that was a whole list of things on its own! And then came July and my sweet baby was born.
Having a newborn meant that I took a good long break from my projects until the next January when I was feeling stable and capable of tackling them once more. Still, having a baby around has limited how many projects I can tackle each month, but I’m slowly and steadily ticking off my Master Project List one month at a time. I’ve also recently added a Landscaping section to my Master List, and this summer I plan to focus exclusively on those yard projects. Ultimately my goal is to get my Master List down below 30 unfinished projects at a time (I’m currently sitting at 70, including this lengthy Landscaping section) by the end of this calendar year.
But that is a tangent and let me get back to the matter at hand: how did I do with my projects in March, April, and May and how did this method change my life for the better?
Let’s get into it.
March
March was amazing. I already told you that I was so excited and motivated by this new idea that I finished my designated 8 projects in about two weeks. With the entire rest of the month to spare, I went into hyperdrive and simply tried to accomplish as many things as possible and cross off as many projects from my Master List as I could.
And I did 20 total, twenty whole projects.
Now I have a big disclaimer with this: I did 20 fairly small projects.
I’m not giving you this warning to try to degrade myself or my work; I still accomplished a ton and I’m so proud of that!
But for the second half of the month, this was my system: Every night I’d glance through my Master Project List scanning for all of those small projects I’d highlighted as “Things I Could Get Done in One Day.” Some of these took half an hour or less, so I could easily do three or four in one day.
For example: I wanted to make labels for our new Christmas toys in our toy closet. I label our toy boxes super easily with 5×7 index cards and a big sharpie. That took me all of ten minutes to pull out my index cards and write, “Pirates,” “Legos,” and “Magnets.” It was so fast that I even rewrote a few other labels that have since been damaged. Done and done! Project accomplished and crossed off my list!
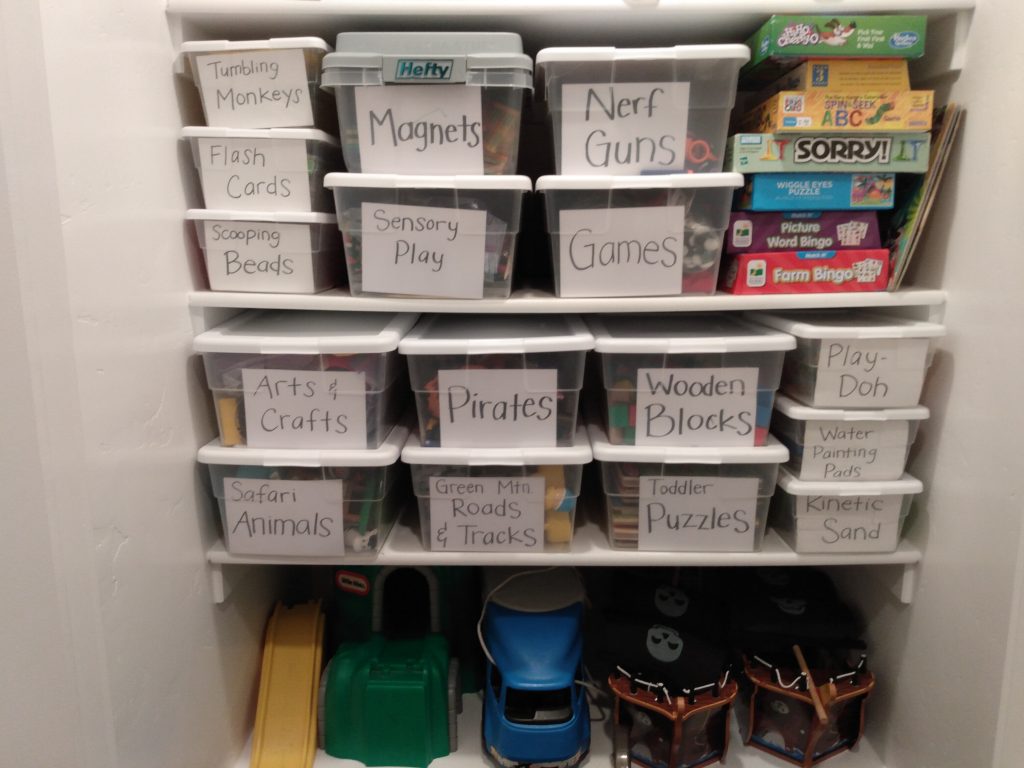
It sounds so easy that you might think it’s dumb to even include something so simple on my Master Project List at all. I disagree. I’d been meaning to update those toy labels ever since Christmas, but had I actually done it? No. So every time I opened the toy closet for my boys I was just reminded that I’m such a slacker, and that thought was so discouraging that I kept ignoring and ignoring and ignoring the issue.
But now guess what I think when I open that toy closet? I look at my neat, new labels and think, “Look! I did it! I accomplished this thing! It’s so neat and easy to use! I love it so much! I’m such a good homemaker, me and my index-card labels!”
That feeling alone is way worth it.
If you’re curious, some of the other easy projects I did in March include: fixing the scratch on my side table with a furniture marker (again, that took less than ten minutes), gluing the broken drawer-stop back into my jewelry box, returning some homeschooling books I borrowed (and had long-since read) to my cousin, sorting a specific set of toys for all the broken pieces (again, I’ve noticed this needed to be done way back when, but did I ever do it? No!). I also put away my regular clothes and updated my closet with maternity clothes, put all our winter gear and snow clothes into storage for the season, and upgraded two of my boys into a bigger size of clothing. I also made an entire digital scrapbook, start to finish, of my mother-in-law’s wedding.
Perhaps the biggest project that I finished was those Quiet Books that I mentioned above. That took a while, but I was so glad when it was finally done.
I spent one whole night just printing files from Pinterest and weeding through all the stuff I’d pinned there through the years; some of it was great and some of it wasn’t and so was deleted from my board entirely.
The second night was cutting out all those pieces I’d printed. A third night was laminating everything. A fourth was cutting out all the laminated stuff. And finally I put velcro dots everywhere I needed and added all these new pages to my Quiet Books.
It was such a big project, and I definitely got really tired of cutting things out–no wonder I’d been overwhelmed by it and so procrastinated it this long! But breaking it down into those little steps helped a ton.
It sounds too simple to be true, but it really makes a difference to tell yourself, “Tonight I’m going to laminate these pages and then be done,” compared to, “Tonight I have to make an entire Quiet Book!”
Yikes! No wonder I was so overwhelmed.
But throughout the month of March I made over 15 Quiet Book pages. And I’m happy to announce that we’ve been taking them to church ever since and my boys have loved them!
Yes, it all sounds very simple, but the point is that I did it all and more! I felt amazing and I was so glad to finally feel like a project finisher and not just a project starter.
But I had another realization while doing all this. As I regularly looked through and crossed things off my Master Project List, I found more and more projects listed there that I actually didn’t want to do. There weren’t a ton, but enough that made me stop and reevaluate things. These were things that I hadn’t started at all, but were vague someday-I’ve-been-thinking-to-do-this-cool-thing kind of projects. Most of them were crafty things, to be honest, things I’ve thought to build or create. But those kinds of projects are time consuming, not to mention really hard.
So I deleted them. Seeing everything else listed there reminded me that I’m already busy enough as it is; I don’t need to add more and more unnecessary and new crafty things into my life when I already have so many that still need finishing. And that realization was such a huge relief in and of itself: I don’t have to do all the things.
Most importantly, I learned that I’m allowed to say “No!” even if I have to say it to myself.
April
I got tons of small projects done in March, but in April I chose to focus on fewer but larger projects.
Every April and October I deep-clean my house (find my list of what I do and how for my deep cleaning here!), which is usually a pretty big deal in and of itself, so I chose to make this semiannual deep clean a part of my monthly projects. Yes, I said earlier that routines and chores aren’t projects, but since this deep-clean is only semiannual and will actually end (even if it only ends for six months), I decided to make an exception here.
My other big project was to hang pictures in our living room. I’ve had this plan in my head for years and years now to put up baby pictures and a current family picture on my wall. We moved into this house two years ago and while I had this grandiose plan to do it, I never actually did.
I also said, when I described my USA Travel Map project, that I was specifically waiting to do that project after I’d hung other pictures, and this big wall of family pictures is exactly the project I was waiting for.
This project sounds simple enough on paper, but it ended up being way bigger than I thought. I wanted to put up letters to spell “Family” along with my pictures, so I spent lots and lots of time shopping around for those letters but was disappointed and never really found what I wanted. So then I bought unfinished wood letters and painted them myself, which was a big deal in and of itself that took me several days.
After my letters were painted and ready I bought picture frames and printed all my desired pictures. Even framing all those pictures and cleaning all that glass was a big thing that took up an entire evening.
Finally I was ready to hang everything up on the wall. I told you that I only listed projects that I could do entirely by myself without needing my husband, but for this I made an exception. He so kindly stayed up very late with me one night and helped me calculate all the mess that we needed to make sure the whole thing was centered on the wall, the pictures and letters were centered with each other, and of course everything was level. It was a super exhausting night, but we did it! And now I love it! Look at how amazing my wall looks!
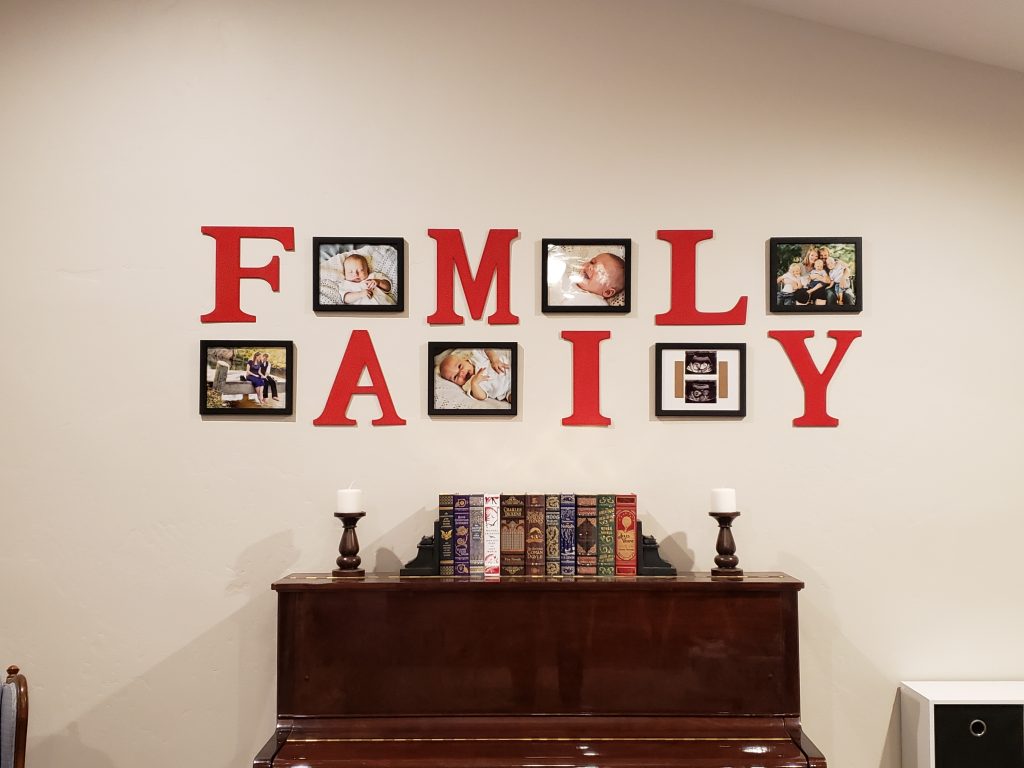
You’ll notice that the first picture is my husband and I together. This was one of our engagement pictures. I originally planned to put a wedding picture in there, but I made a mistake. I was sure that I had a nice printed wedding picture of us stored away from when we moved, so I didn’t bother printing a new one. Then when I went to retrieve this particular wedding picture I was surprised to find that it was a vertical portrait-style print instead of the horizonal print I wanted. So I substituted it temporarily with this engagement picture I already had printed, which is still a great picture.
Also note the ultrasound in the fifth picture under the L. Obviously I put this whole thing up while I was still pregnant, so in a few months when she gets an appropriate picture taken, I’ll update that frame as well. I plan to print a horizonal wedding picture at the same time and knock out two birds with one stone. And of course I can update the family picture at the end as well.
Those two big projects, deep-cleaning my house and hanging those family pictures, were really big and time-consuming, so I didn’t have any time afterwards to take on other projects like I’d done in March. Still, that’s perfectly acceptable and I still felt wonderfully accomplished.
To counterbalance these two big projects, I specifically planned some smaller ones. Well, technically I planned some smaller sub-projects.
A few of the projects on my Master List are huge, as in they will definitely take more than a month, or maybe would take 100% of my attention during one month, which I simply don’t have to give. Therefore I broke down those projects into mini sub-projects and listed those to finish during the month of April, instead of trying to tackle the entire thing. The two examples of such projects are as follows:
One of my digital scrapbooks is the largest of all of them: my London scrapbook. Back in my college days I spent a summer studying abroad in London. It was a life-changing experience in the very best way and I’ve always wanted to make a scrapbook of my trip. But having been in London for so long (and also taking several mini-trips around the UK while I was there) means that I literally have thousands and thousands of pictures. And that makes for a really overwhelming scrapbook.

I’ve started this scrapbook of course; I actually started it the day I got home from London nearly a decade ago. And I’ve slowly chipped away at this scrapbook ever since, opening it every other year or so, but getting too distracted by other scrapbooks in between, such as my later wedding book and my son’s first-year baby book. So my London scrapbook has sat around half-finished all this time.
So of course I listed my digital London scrapbook as one of my projects, but it’s so big that I knew I’d have to break it down. Other than it simply being a huge project in and of itself, I knew that I’d get burned out if I tried to do it all too quickly. I like digital scrapbooking, but I find it way more tiring than paper scrapbooking, probably because I get tired of staring at a screen for so long.
So instead of trying to scrapbook the entire thing, I made a goal to scrapbook only five day’s worth of pictures during the month of April. That was much more manageable without getting overwhelmed or bored. And that’s what I did: five day’s worth of London pictures. I figure I might alternate my digital scrapbooks: every other month I’ll work on my London book alternating with a different book, such as a Christmas book or one of my babies’ first-year books, just to keep things fresh. It will still take some time to finish this London book, but at least I was able to say that I made some good progress on it, and that felt good.
Another one of my huge projects is also related to scrapbooking. I told you that I love paper scrapbooking (I typically paper-scrapbook regular day-to-day pictures while I reserve the fancier digital scrapbooking for big events and vacations), but I admittedly don’t have a lot of time for it recently. It’s simply too time consuming and too messy, which is downright dangerous when I have little ones around. But I still love it and I look forward to a day when I’ll have more time and space for it.
About a year ago when I was particularly missing my old hobby and pondering this issue, I came to part of a conclusion. I realized that the most time-consuming part of scrapbooking was looking through all of my vast array of supplies for matching things. I have packets of patterned 12×12 paper, cases of cardstock, boxes of stickers, jars of fancy flowers, and folders and folders and folders of cute tags, cards, and other embellishments. All of these supplies are organized very neatly in my scrapbooking cabinet, but they are all separate. I have to first look through all the 12×12 sheets, then look through the cardstock, and then peruse all the various decorations. Lo and behold I’ve now spent upwards of half an hour simply looking through supplies and not actually creating a single page.
So I rethought my organization system and began organizing all of my supplies into matched scrapbooking kits. I started with a theme, such as a holiday, and then I gathered all the coordinating stickers and decorations. Then I matched all of that with appropriate printed papers and plain cardstock, and then put everything into one 12×12 sheet protector. Then I labeled it per theme.
The idea is that come scrapbooking time, I’ll be able to look at my pictures and think, “Okay, these are Halloween pictures. I’ll look at my Halloween kits,” and choose the one that best matches my pictures. Then everything I could possibly need for that page is already there on hand in its very own kit and I don’t have to spend time perusing ten different boxes and folders wondering what goodies I have that might possibly coordinate.
That’s the plan, anyway.
And like a good project starter, I indeed began matching, assembling, and labeling scrapbooking kits.
But it’s a huge job. It’s not that I gave up on this one, it’s just that it’s extremely slow going, sifting through piles and piles and folders and folders and boxes and boxes. I’ve made some progress, but the sheer amount of paper and supplies that I own is very daunting.
So again, I broke this mega-project into a smaller sub-project. I planned for myself to assemble 10 kits during the month of April, just 10 little kits. It only took me two evenings, which was easy enough and very doable.
Like my London scrapbook, I wasn’t able to totally finish this massive project and therefore mark it off my Master Project List, but it still felt good to make some progress. And again, I’m thinking that if I can slowly pick away at this project in this way, with just 10 matched kits every month, then someday I’ll have the whole thing finished.
May
I will be totally honest here: May’s projects didn’t go quite as planned.
I already described how my USA Travel Map was delayed and delayed, and unfortunately that delayed another project as well; we own a very large and beautiful painting of Jesus Christ that, like every other picture in my house, has been waiting these two whole years to be hung. Like the Travel Map, I was specifically waiting until after I did those family pictures so I could more accurately judge and decide where to hang this large painting. So I listed it as a May project, to hang this painting, thinking I’d do it at the same time that I hung my Travel Map. Well that meant that all the delays on my Travel Map also meant delays for that painting too. So both of those projects were pushed back into June.
But I tried another kind of project this month that I unfortunately wasn’t very successful with: Lego organization.
My first two sons (ages 5 and 4) LOVE Legos. They’ve both been getting Lego sets for Christmas and birthdays for a couple years now, and they both especially love playing with the HUGE assortment of Legos at their grandma’s (my mom’s) house.
Yes, my parents own more Legos in one closet than anyone else I’ve ever known. All of my brothers and I were way into Legos when we were kids, so we have tons and tons and tons of Legos: cowboy Legos, castle Legos, Harry Potter Legos, Star Wars Legos (so freaking many Star Wars Legos!), racecar Legos, pirate Legos, and of course bins and bins and bins of freestyle Lego pieces that don’t belong to any specific set.
My family and I organized all these Legos years and years ago when I was in college, after everyone had outgrown them. We organized them by color, and each of those beautifully colored bins are stacked neatly in a storage closet in their basement. There’s also an entire box devoted to people pieces and accessories. It’s beautiful!
Until my excited and eager boys were set loose.
There went our beautiful color-coded organization. I was constantly frustrated with having to clean up and reorganize and resort all the Legos that my boys had gotten out, mixed up, built with, and then demolished, all before we went home after a visit to Grandma’s house.
So I had to rethink things.
My oldest son always wanted to assemble grandma’s many sets, but it was just too overwhelming for him. Heck, it was overwhelming for me too. He didn’t like having to dig through a big ol’ box of entirely black pieces just to try to find one specific piece. He got frustrated and distracted easily. In the end, he usually asked me to “help” him find the pieces he needed, which ultimately became me doing the entire thing for him, which I simply couldn’t do, not with two other little ones also vying for my attention. It was taking us several hours in order to build a simple racecar, and that’s just ridiculous.
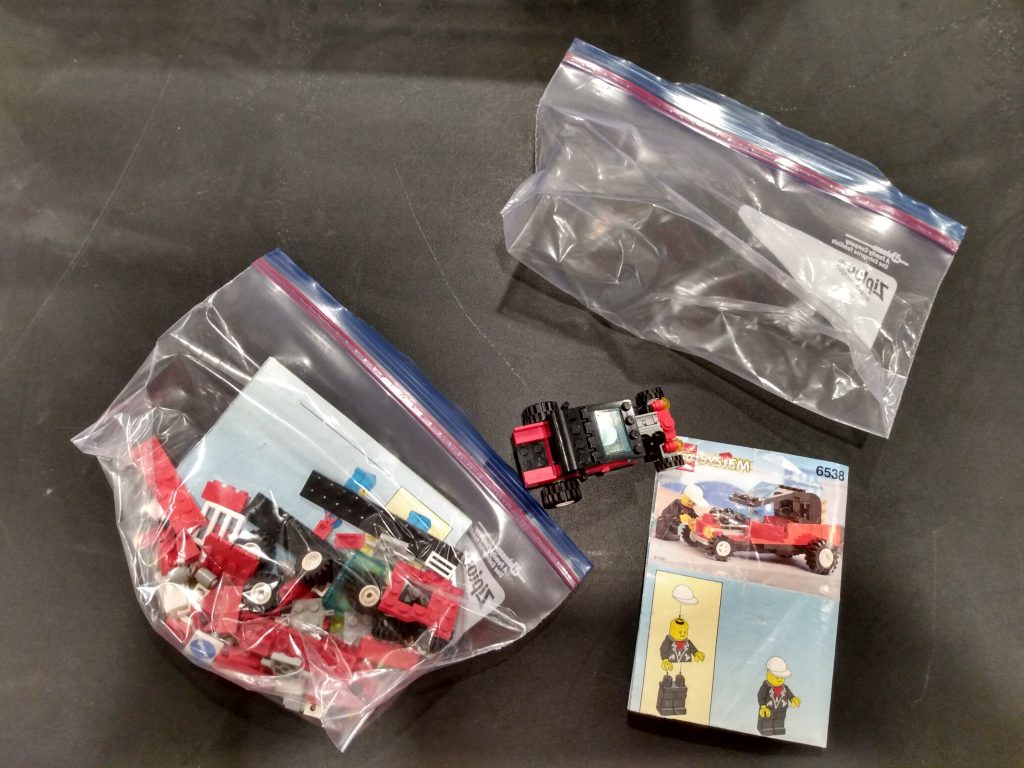
So I decided to assemble Lego set kits. I got a bunch of Ziploc bags and began setting all the pieces and people along with the instructions into that bag. The theory is that my son can grab a single bag, build the set inside without getting bogged down with the dozen color-coded boxes, and then easily clean up the entire thing by putting it back into its Ziploc bag when it’s time to go home, rather than trying to resort the pieces back into their colored boxes.
It’s a great idea, right? But the execution was more difficult than I planned. Like building, it took me hours and hours and hours to find all the necessary pieces for a set simply because there are so many places to look. And I was constantly interrupted by the needs of my boys, of course. Not to mention that I wanted to actually have some time to visit with my mom when I was at her house, believe it or not, and I didn’t want to devote all my visits to hiding in her basement going through Legos. And then my boys were always upset with me when I tried to explain to them that I wasn’t actually building, only sorting.
Whew! It was exhausting to say the least.
So come May I decided to do something more. I obviously needed some uninterrupted adult-only time in that basement, time when I wasn’t being interrupted by poopy diapers or grabby hands, and time when I wasn’t hoping to chitchat with my mom. So I planned to go after my boys’ bedtimes and have a few hours in that basement all to myself with those Legos.
It’s a great idea, I know, but unfortunately didn’t go quite as I planned either. For one, I got sick in May on my first designated Lego night and had to cancel. After that I went out of town for my vacation, which of course was wonderful, but still it was another delay to my projects back home.
Then I was simply tired at night! I was seven months pregnant at that time which meant I was big and uncomfortable, and with the heat of May I found my ankles and fingers beginning to swell. Come 8:00 when my boys were in their beds, all I wanted was to sit back, relax, and put my aching feet up. I did not want to drive to my mom’s house to sort Legos.
So I went once in the month of May, just once. It was a very productive evening, yes, and I completed 4 Lego set kits in that single evening. But it was only 4 out of the 10 that I originally set my goal for, and so I was disappointed with myself.
So that project is still ongoing. I’m going to have to enlist the help of my brothers with this one, I think, especially for some of the bigger sets. But in the meantime I learned this about myself: I need to plan projects in my own home, not at my mom’s.
Now don’t read all this and think that May was a complete failure for me. On the contrary, I only listed three projects that were delayed into June. But I still successfully completed four other projects throughout the month, smaller projects in my own home, but I completed them nonetheless! And next to those frustrating setbacks and delays, I was happy to take whatever success I could, and proudly too!
Conclusion
This system worked wonders for me and if you feel like you are drowning in your unfinished projects, TRY THIS METHOD!
- Make a Master Project List
- Choose a Handful of Projects to Focus on Each Month
- Divide Your Monthly Projects into Small, Extremely Specific Steps
- Follow Those Steps and Work On Your Projects Throughout the Month
- BASK IN YOUR SUCCESS!
Please share your success with the rest of us! Good luck and happy project-finishing to you!